
Today we are learning more about how to build and change a Gutenberg landing page.
Before you change the landing page WordPress, you should decide on the website concept.
Do you want a minimalistic landing page only equipped with the basic blocks without tonnes of tiresome text? Or perhaps, you wish to create a well-crafted Gutenberg landing page with a bulk piece of information?
No matter which structure you will ultimately choose, for the WordPress change landing page will go through, you will need the next “tools”:
- Default Gutenberg blocks (for basic & minimalistic layouts)
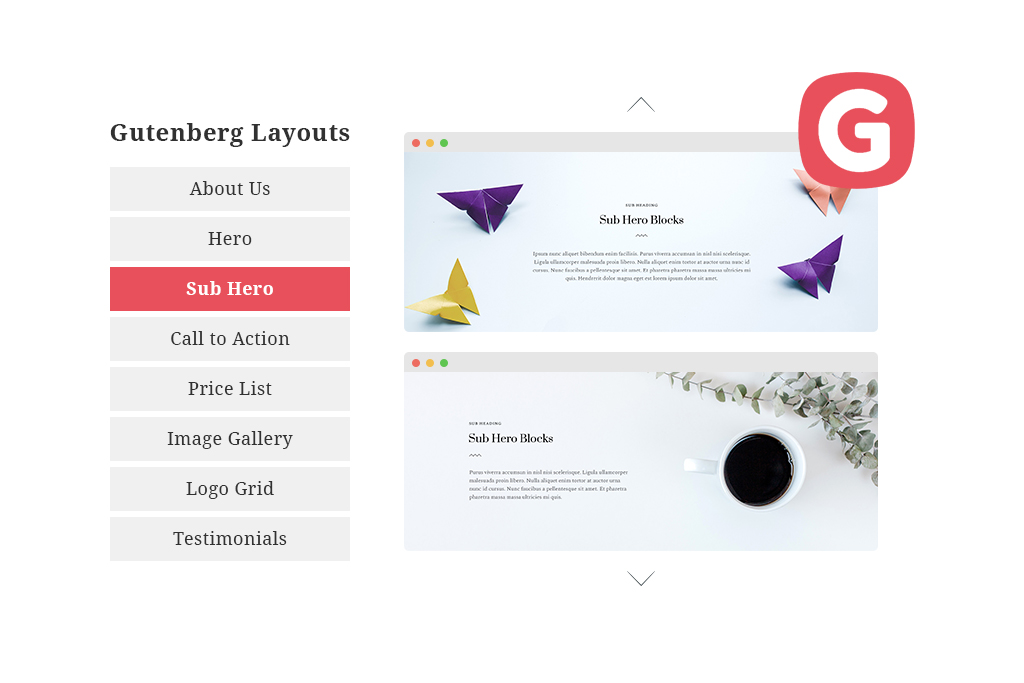
- Extra 40+ free Gutenberg blocks by Getwid (for exquisite layouts)
Both default and Getwid Gutenberg blocks will perfectly suit any purpose, whether you want to showcase your services, create a splash page WordPress, build a portfolio, etc.
Sometimes it may be quite difficult to create a design yourself. For that reason, there are a lot of resources to find inspiration and build a modern and beautiful WordPress website.
Planning a Landing Page Layout
It doesn’t matter how stylish and creative your blocks are if they don’t serve for satisfying visitor’s interests. The landing page layout usually contains a few basic sections, that take a visitor through a short journey, where he learns more about your company, checks the prices, and makes a buying decision. You can roughly divide this journey into several blocks of your landing.
The traditional order of the landing page blocks looks in the following way:
- Hero section, also called welcome block;
- About block;
- Services block;
- Reviews and testimonials block;
- Get in touch block;
- CTA block.
It’s worth noting that this post focuses on the WordPress change landing page layout, and not on the styling options of each block. If you want to explore the potentials of the given Gutenberg blocks, follow the links above.
Finally, you will learn how to create a navigation menu with anchors that will direct you to a certain part of the Gutenberg landing page.
Building a Draft of the Page
Most likely, you came here with a full understanding of your website subject so that we can skip this part and move to practice. In the next steps, we will create a draft of the page with all the blocks, put them in the right places and design the page’s interface.
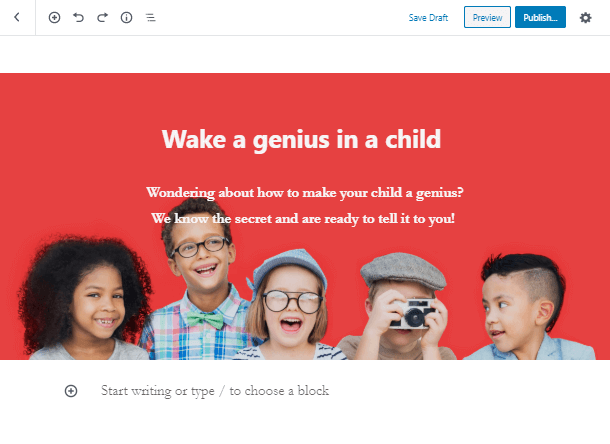
Let’s start with a Welcome block, also known as the Hero section. As you may know from the previous tutorials, a hero section is NOT just one particular block – neither in the default Gutenberg collection nor in the Getwid plugin. The term is used to describe the major section of your homepage, and it typically consists of these elements:
- a background;
- a heading;
- a paragraph with text;
- a CTA button.
In the default Gutenberg collection, you will need Cover & Image blocks to create the needed background – either in a form of colored background, image, or even a video. Finally, you may place a heading or a paragraph inside those blocks to fill it with the text content.
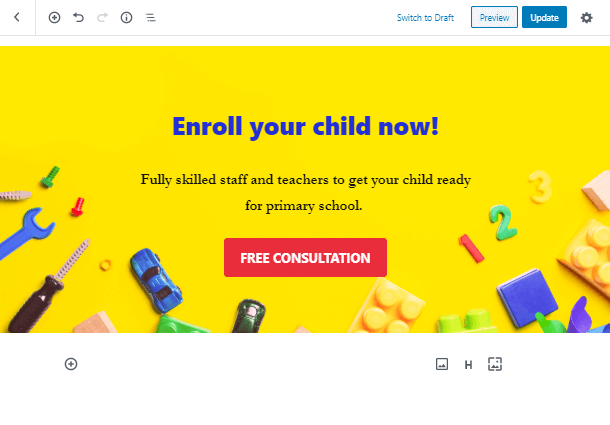
We are going to create a website for a preschool startup. So let’s call the page “Startupper”:

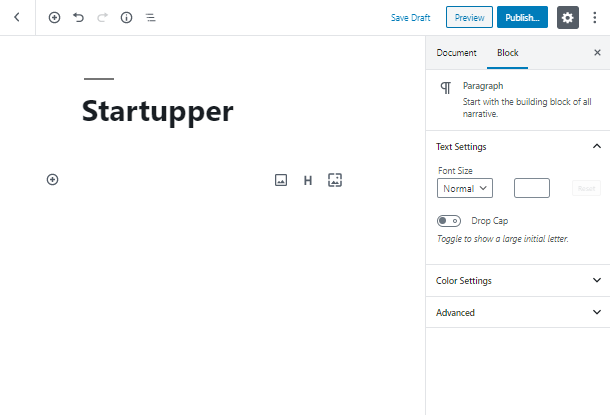
Create a heading for the Welcome section and add a few paragraphs if you want to. Don’t forget to make all the elements of section nested. We will also add a spacer after each block to make the content separated from other elements:

Compared to the default Gutenberg editor, Getwid offers a Section block. With a help of this collective block, you can fit any other blocks inside, whether it’s a Getwid-based or default Gutenberg element.
In our case, you may utilize such Getwid blocks, as Advanced Heading, Image Slider or Media & Text Slider, and Banner, and then combine it with the basic Paragraph and Cover blocks:


As a next step, let’s add the About Us block, which will be introduced by the section with two columns. They will contain a picture with text over it:

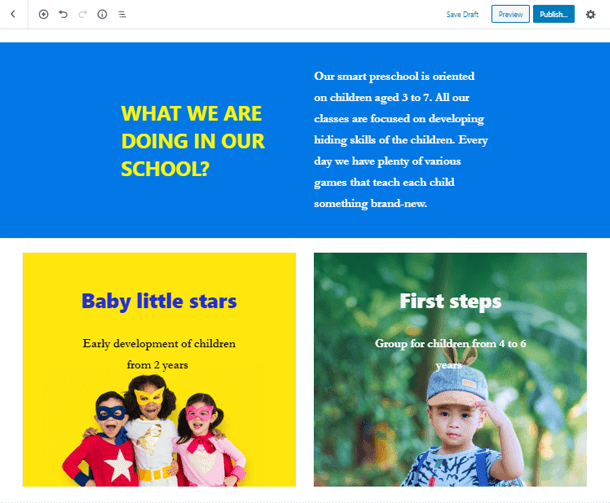
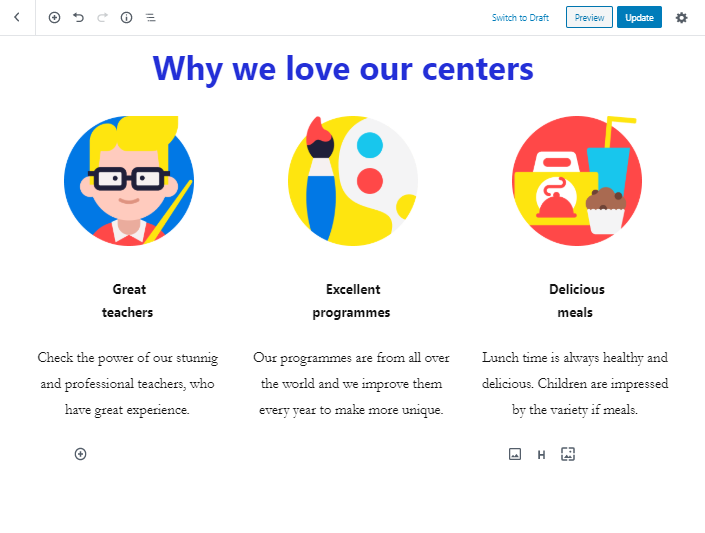
Let’s move on to the Services block! Now add a group with a heading, three columns, which will contain an image and three paragraphs.

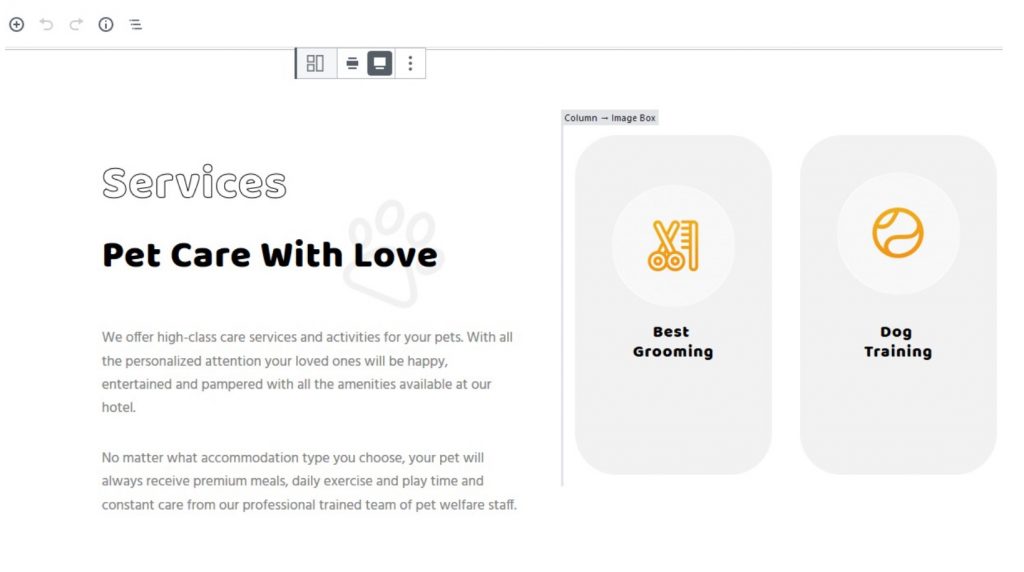
Alternatively, Getwid suggests using the familiar Section block to display the company’s products or services.
As mentioned earlier, you may insert ANY block from your active ones inside the Section container in order to create an advanced Services display:

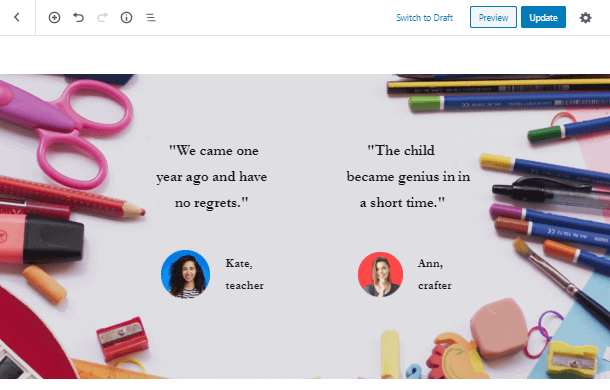
To add a Testimonials block, you need to find the “Pullquote” block among the ones, that the Gutenberg editor provides. Then put the client’s review directly in the block. We’ll do a customization a little later.

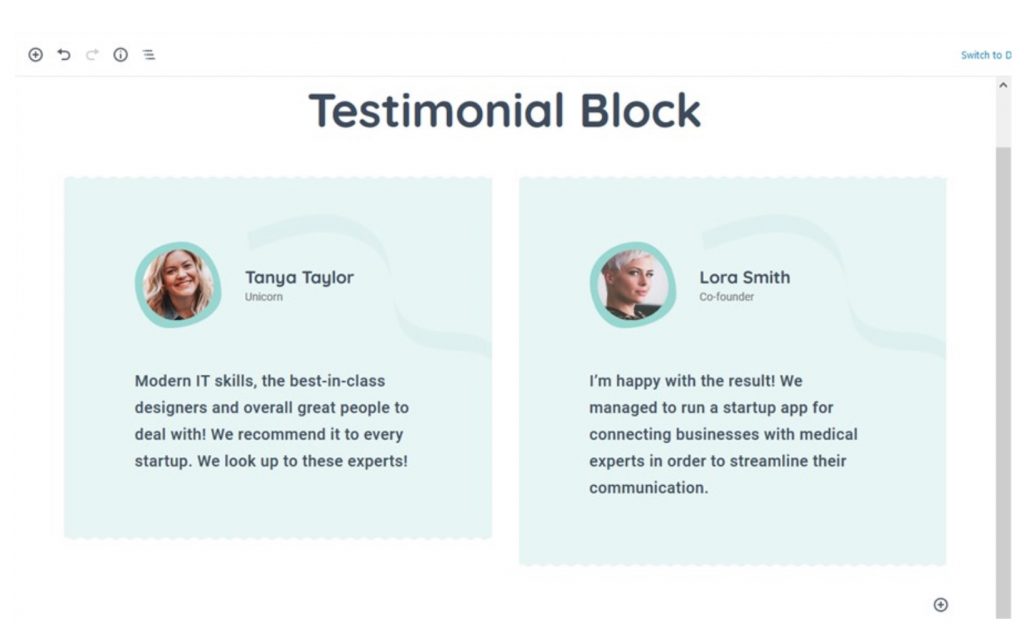
When it comes to Getwid, creating a reviews section is much more fun. The plugin’s Testimonial block lets you play with CSS, add animations and hover effects, and adjust the styling to the current theme in one click.
Just look at these stunning examples:

We’ve almost done! Now let’s make a draft of the Get in Touch block. The minimalistic combination of heading, an engaging paragraph, and social links will conquer the hearts of your clients.

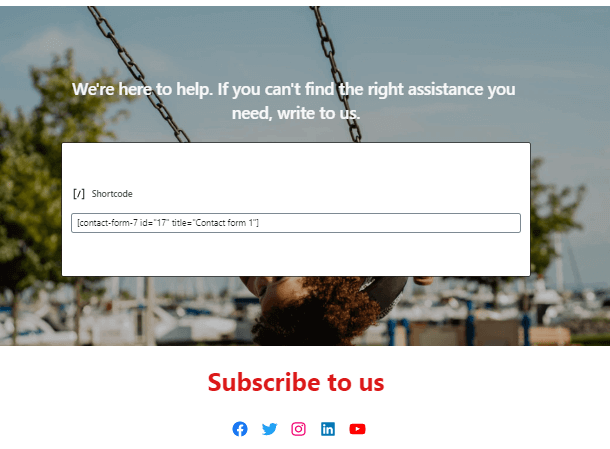
As the last step, we will add a CTA block. We will link the button to the chat.

Complete! To the change WordPress landing page of any type and subject, you needed just a few Gutenberg blocks and a bit of creativity.
Just remember, you may always discover…
More Advanced Getwid Blocks For Your Landing Page!
Yes, Getwid can boast of many more stunning website elements besides the mentioned ones. This FREE collection of 40+ multipurpose Gutenberg blocks will be a perfect addition to the existing opportunities of core blocks.
On top of that, Getwid offers a free multipurpose Gutenberg theme, which is a perfect base for creating stunning landing pages using advanced Getwid solutions.
Check the Getwid Base Demo here.

For a detailed visual overview of Getwid blocks, visit the demo page.
Are you inspired? Stay with us and let’s dive into the developing world. Subscribe to our newsletter and stay in touch for more useful tutorials and instructions!