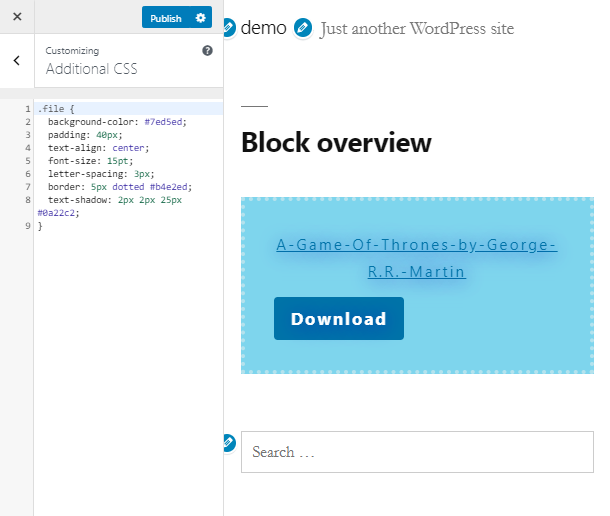
From this quick overview, you will find out more about the WordPress file widget. We will also learn how to customize this block in the Gutenberg editor.
The Gutenberg file widget can be used in many ways and for various reasons. For example, if you are planning to run a library website, you can make a layout with files, which the visitor can easily download. One more way of using a File block comes in case you have a personal blog or a blog dedicated to a book series.
To add a WordPress File widget, simply click on the “+” icon and type “file” text in the search field. After that, you will become able to upload a file or pick one from the Media Library.
NOTE: files like .fb2 or .zip won’t upload, because WordPress doesn’t support such extensions.

Customization of the File Widget
Once you have downloaded a proper file, you can note the Text link settings. Choose whether you want to link to the media file or attachment page. You can also copy its URL and enable opening in the new tab.

In the Download button settings, you may enable the showcase download button, if it will be suitable for the design of your website.

As the last step, take a chance and add some additional options to the Gutenberg File widget. You may apply a CSS class in the Advanced tab. With the help of this option, you can expand the customization abilities of your block and style it in a completely new and fresh way.

Simply go to the WordPress Customizer and choose the Additional CSS tab. Here you have to type the class name with a must-have dot before it. Open the brackets and enter the needed options.
As an example, you may choose one of the following attributes: set the background color to catch the visitor’s eye. Paddings are important while customizing any blocks. Font settings may also be used to make your text more attractive.

Subscribe to us and let’s build an excellent website with our simple and quick overviews!
