From this quick and simple tutorial, you will learn what are Gutenberg blocks and what Gutenberg blocks collection includes. As a result, you will also learn how to apply nested and reusable blocks in the Gutenberg editor.
It’s not a secret, that the Gutenberg editor blocks, above all, provide a new wide approach to website building and allows you to create your own unique site structure. The main advantage is about building a custom WordPress page with Gutenberg blocks collection. You don’t need a line of code to do it. You become completely able to power-up your pages even if you have a bare-bones simple WordPress installation.
Additionally, you may check this video to quickly go through the functionality of Gutenberg blocks, and the ways to use block groups and reusable blocks.
How do the Blocks for Gutenberg Work Under the Hood?
Above all, let’s demystify the Gutenberg editor blocks. Basically, they are chunks of content, with the help of which you can create any website, from a contemporary blog page to a multipurpose online store. Blocks for Gutenberg were created to expand the functionality and let us work with the structure.
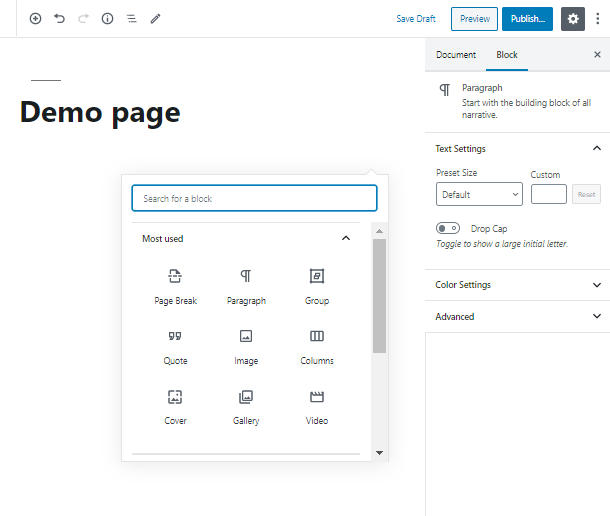
Firstly, let’s jump into the editor and explore how the Gutenberg blocks collection composes the page. There are a few ways of accessing Gutenberg blocks in WordPress:
- The most simple way is to press “Enter” on the keyboard and make a new paragraph. After that, you will be automatically offered to add a Gutenberg block. All you need to do is just press the “+” icon.

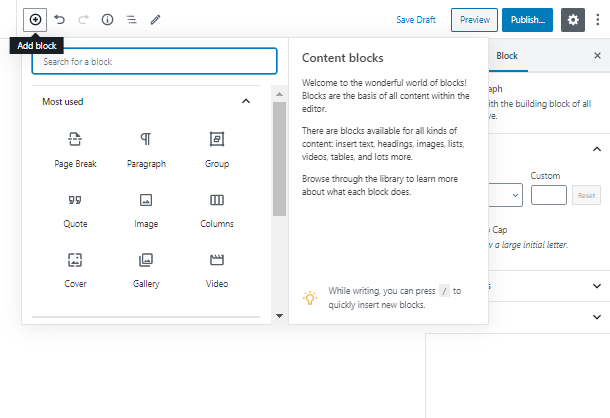
- Similarly, click on the “+” icon, which is located at the upper left corner of the editor field.

- You also can add a block above the chosen one. Hover above any block and press the “+” icon.
Basically, each Gutenberg block gives you a few various possibilities, let’s take a quick look at them.
- You are able to transform your block to some other blocks, such as heading, quote and a lot more.
- Also, you can set the alignment of the block in one click.
- Make your text bold or italic.
- Add a link, inline image, code or strikethrough in the same way.
Create a Website Structure in no Time with Gutenberg Editor Blocks
Obviously, you may wonder, how else can you speed-up the process of website building and make it an enjoyable journey. Check out the list of the default Gutenberg blocks:
| Paragraph block | Gallery block | Heading block |
|---|---|---|
| Quote block | List block | Cover block |
| Image block | Audio block | Video block |
| File block | Columns block | Button block |
| Spacer block | Media and text block | Page break block |
- Each Gutenberg block has a set of options above, where all the basic settings are gathered to take the hassle out of your work. Firstly, add a link, work with text elements, add an inline image – it’s up to you!
The ability to transform each block into at least three other ones comes in one click
- If you click on the three-dotted icon, as a result, you face the list of additional opportunities according to your Gutenberg editor blocks, from inserting blocks to editing as HTML.
- In addition, one more block-specific option is adding a custom CSS class for your Gutenberg block.
What are the Nested Blocks and How to Make Your Blocks Reusable?
Sometimes you need to move a block around the page or add the block, which already contains a bunch of content, to another page. This process is super easy. Let’s imagine you have, for instance, an encouraging heading, which stimulates people to subscribe, and a call-to-action button with the related text.

Agree, it’s quite tedious to move the blocks separately. What we need to do is to move a few blocks into more than 5 sections on more than 5 pages. The Gutenberg blocks collection allows you to make your blocks nested, which will solve this annoying problem!
- Firstly, to add a Group, simply click on the “+” icon and type the “Group” text into the search field.
- Add the group and drag and drop the needed Gutenberg blocks inside it.
As a result, now you can move the related blocks together! Although, you still need to add the group on various pages. It’s time for the reusable Gutenberg editor blocks! Creating a reusable block is easy as pie.
- Select the group of blocks and click on it. The additional panel will appear above it.
Click in the three-dote icon and find the “Add to Reusable Blocks” tab
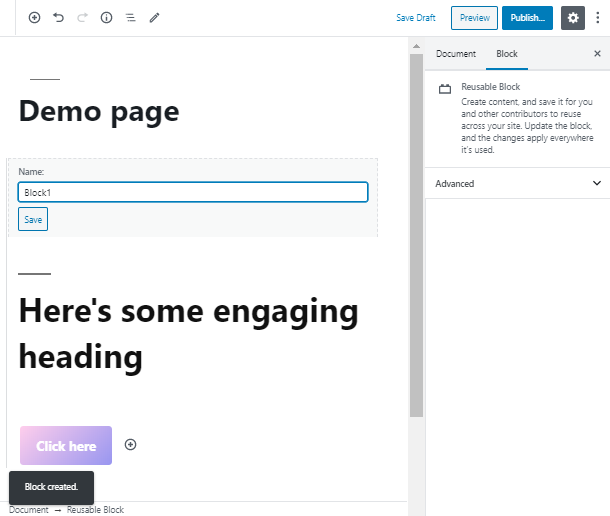
- Give a name to the newly created reusable block and click on the “Save” button. Now you can use it all over the website! You can always find it at the bottom of the blocks dropdown.

Can I Get More Gutenberg Blocks?
Absolutely! All you need is to download Getwid blocks plugin and you will get 40+ advanced multipurpose blocks at your disposal. You don’t even have to pay anything – Getwid plugin 100% free of charge.

Let us explain. WordPress developers create plugins with extra blocks to help users create more exquisite designs via Gutenberg editor. They are open-source software and downloadable from wordpress.org.
So Getwid is so far the largest collection of Gutenberg blocks that you may find out there, and it features 40 static & dynamic content elements.
A few more Getwid features are:
- 35+ pre-made designs
- Extensive attributes for each block
- Automatic style adjustment
- Real-time customization
- Compatibility with each WordPress theme
The list of Getwid elements includes such highly-demanded blocks as Banner, Accordions & Tabs, Post Slider, Price Table, Instagram, Google Maps, and more.
Now you know what are the Gutenberg blocks and how to use Gutenberg blocks on the WordPress website. Stay with us to see more useful tutorials and instructions!
