When a newly-built WordPress website is up and running, it takes just a blink to get the media library fully-loaded. A few months later, all of your media grow into loads of files. Dismal as it might sound, while we always browse files in our PC in folders, the WordPress admin dashboard provides no such option. So you need Filebird – WordPress media library folders
My clients, many a time, complain that it takes them too much time to sort through all those files. As a result, a tree view of folders has soon enough become a standard requirement from my clients.
In this article, I am going to show you how to create folders and manage media files easier with the FileBird plugin. The free version enables you to explore full premium features, but with a folder amount cap of 10. However, that’s already enough for a portfolio or business website with up to 10 categories.
This powerful WordPress plugin even has more features than you can imagine now and I’m gonna show you all.
Let’s dive right in.
INSTALL FILEBIRD
Let’s say you want to open a website for your resort using WordPress. You need this website to showcase hotel rooms, facilities, food and beverage menu items, services, events, etc. You want every file to have its own place so that you can find them easily. Here’s how FileBird helps you do that:
Download and install the FileBird plugin that fits your own needs:
MANAGE A FOLDER IN FILEBIRD WORDPRESS MEDIA LIBRARY
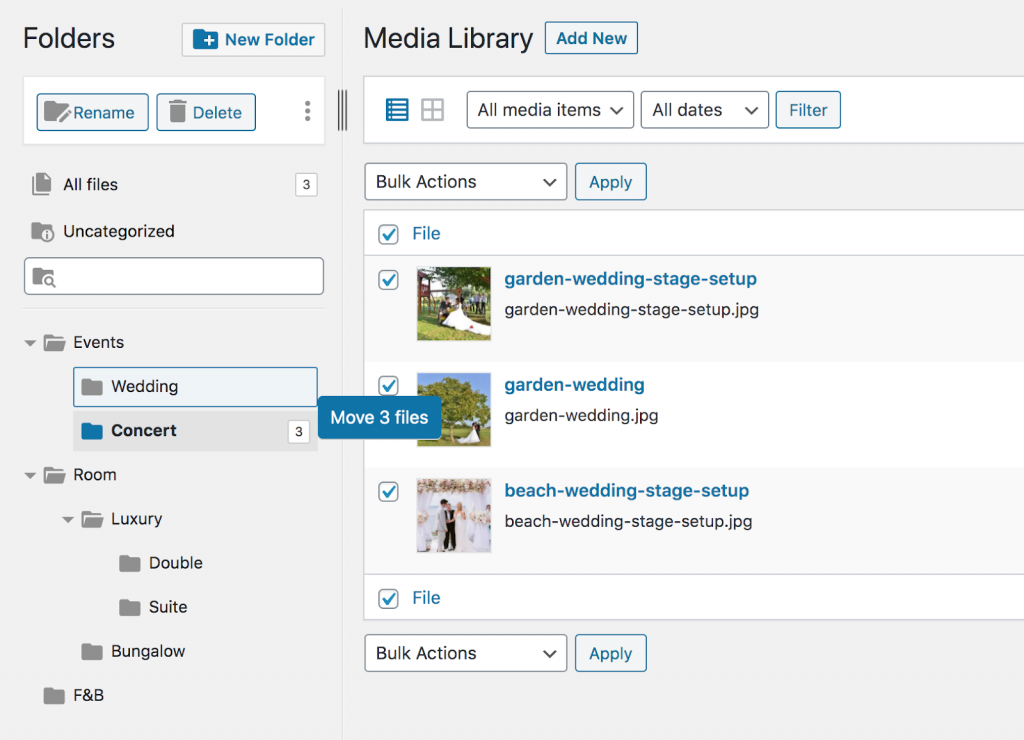
After activating the FileBird plugin, you’ll notice a brand new section in the Media area. It’s nestled next to the WordPress admin panel just like another sidebar. This sleek sidebar can be adjusted to hide or expand to fit your folder name length.
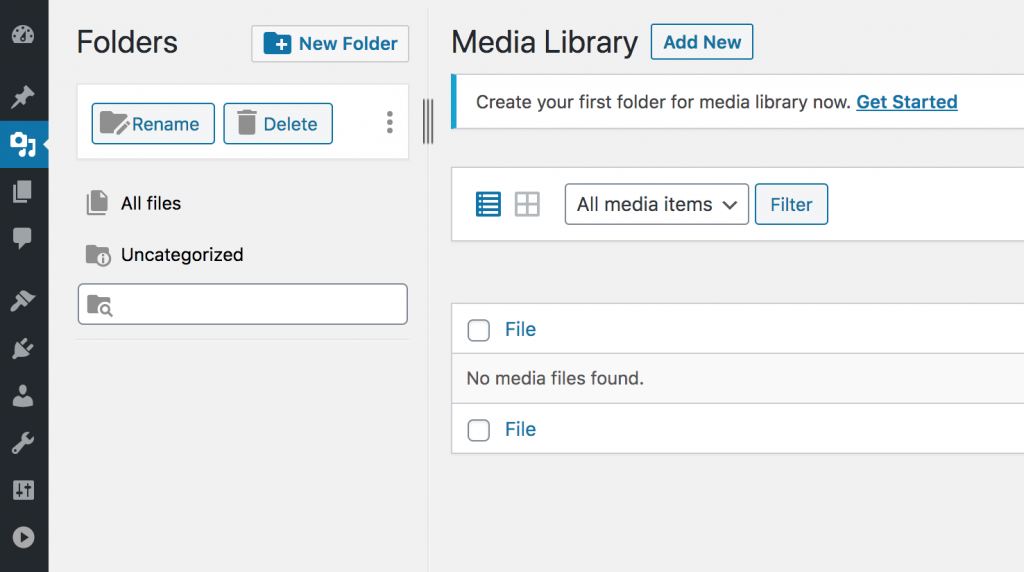
The two default folders, namely All files and Uncategorized, are undruggable.
Now let’s create the first folder by clicking New Folder and give it a proper name, like Room, F&B or Events. Then, if you click New Folder while selecting the Events folder, you’ll be creating a subfolder and this will be placed right under the parent folder Events. You can now give it another name and press Enter to have it all set.
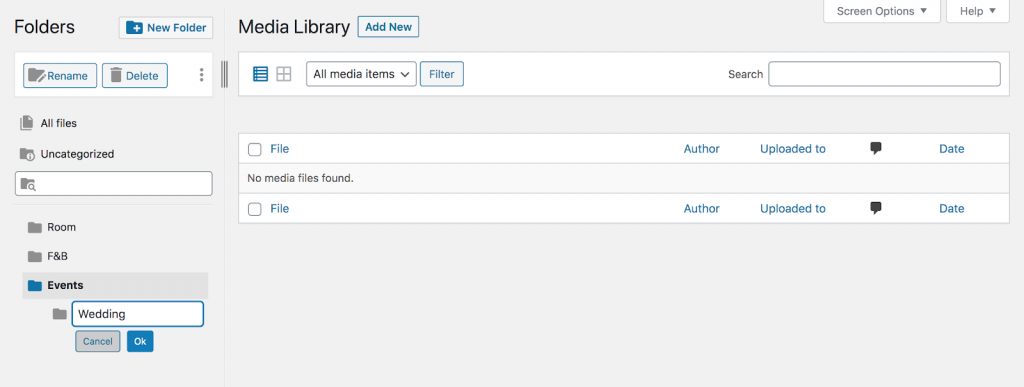
Go on and create all folders you need to get your pictures and videos categorized! If you happen to create folders by mistake, you can easily drag and drop any folder and subfolder to put them anywhere you want them to stay.

This is the new directory for all of my media files and I’m really happy with it!
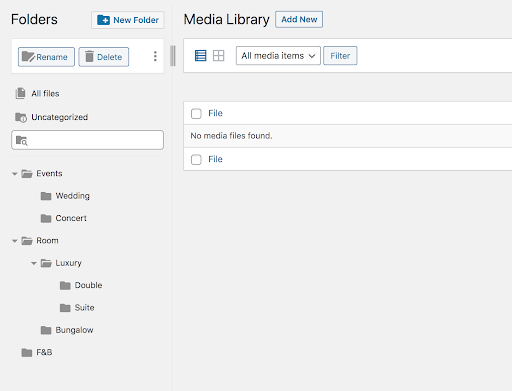
After you’re done with a decent tree structure as a layout for your media file organization, move to the next step.
UPLOAD & ORGANIZE MEDIA FILES
Alrighty, what are you waiting for? Just click Add New to start uploading your files!
On the next screen, you’ll see a drop-down menu on the top indicating the folder you want those to-be-uploaded files to stay. Then you choose a specific folder or subfolder and click Select Files to upload.

In case you accidentally upload files to the wrong folder, you can always fix it by bulk selecting them and, again, drag and drop them to the right folder. Looks a bit too cool, huh?
Now it’s time to rock! Let’s move on to the next tutorial.
PUBLISH MEDIA FILES WITH FILEBIRD WORDPRESS MEDIA LIBRARY
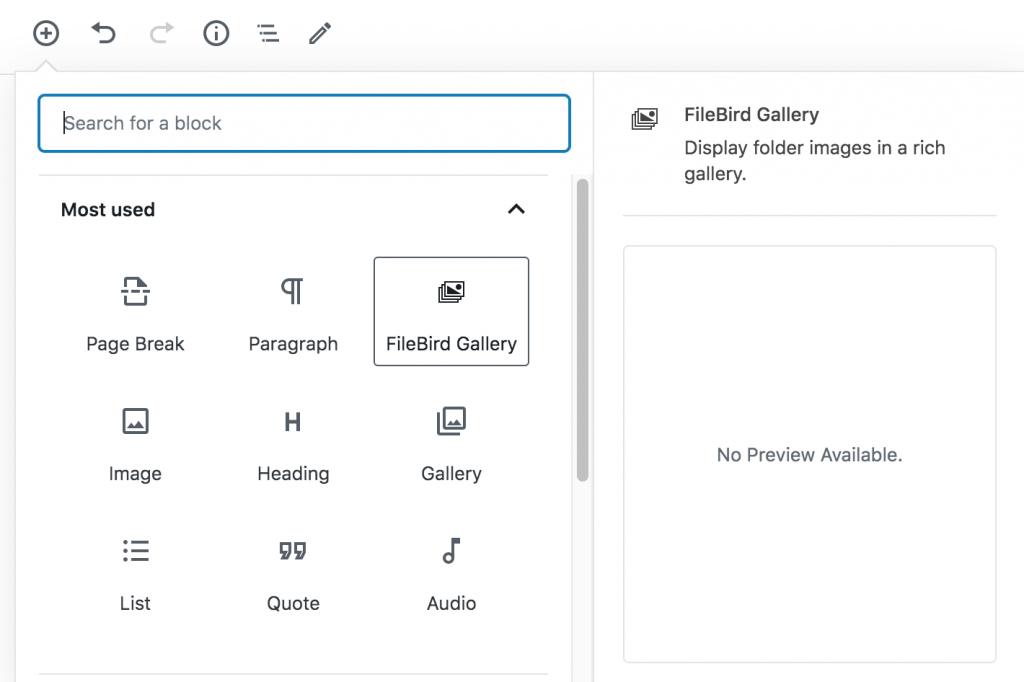
Create dynamic galleries from a folder with Gutenberg block
I also need to showcase my business’ services in a blog post. Take, for example, a post of my resort annual roundup. In this post, I’d love to have the best moments of my resort parties and ceremonies featured.
FileBird – WordPress media library has made it very simple to insert many pictures into posts, all shown aligned. By clicking Add FileBird Gallery and choosing a folder, you’re importing all of the images in that folder to the post.
Now that I set some parameters in this gallery block as below:
- Columns: 3
- Crop images: Yes
- Caption: No
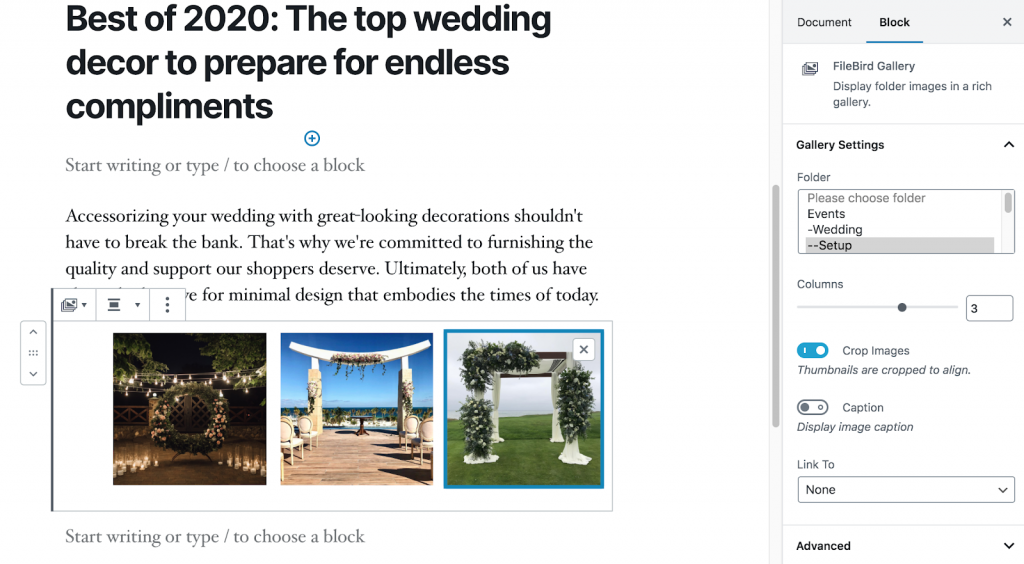
Here’s what I get when published:

So I carry on putting together all images and videos to neatly and proudly show to my website visitors, who are also my next customers.
Manage FileBird – WordPress media library folders professionally
Go to Settings > FileBird and have the 2nd option turned ON, you’ll have another interesting organization feature.
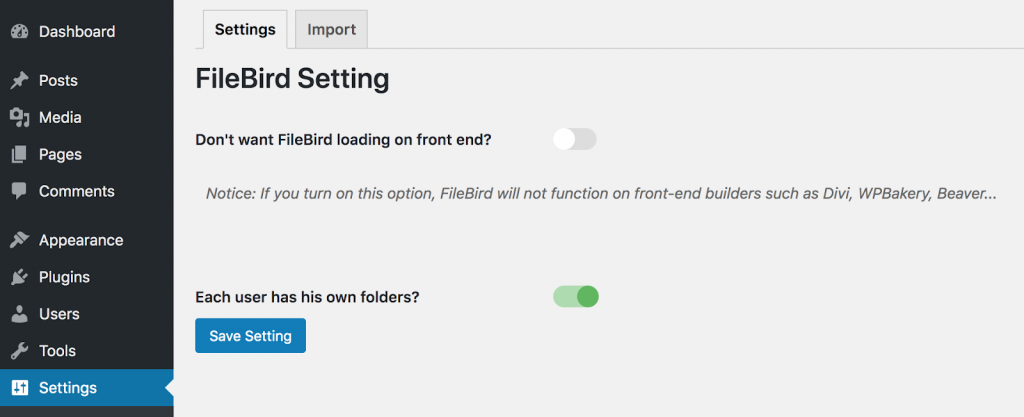
With this setting, you opt to set other users to have their own folders. Your editors and authors can contribute files to their folders, while you – as an administrator – can access all those files. This feature is useful especially when you have a big collaboration project which requires media contributed by many people.