From our today’s tutorial, you will find out how to create a WordPress navigation menu in a few in Elementor page builder and Gutenberg editor. Such type of menu is widely used for landing pages where the entire content is placed on a single page. Not only will you come up with an easy navigation tool, but also be able to create a mega menu section with multi-content submenus.
What is a WordPress Navigation Menu?
Your website menu might seem like a combination of text and icons linked to other pages or page sections. In reality, a WordPress navigation menu is a vital element for the user interface and website optimization. Like a roadmap, menus should look clear” despite the amount of content.
Whether it’s a news portal, a travel blog, or a simple one-page landing page, it’s almost impossible to find a website without a navigation menu. On any resource, you are likely to see a menu at the top of a website close to the title.
From here we may conclude that a navigation menu is a must-have for every website owner.
How to add a navigation menu in WordPress?
Luckily, creating WordPress menus can be fun. Instead of writing code on your own, WordPress developers offer intuitive and user-friendly solutions in form of WordPress navigation menu plugins. Using a WordPress menu plugin provides more practical features and customization options.
Today you will learn how to create a navigation menu WordPress with:
- Elementor page builder (Stratum Mega Menu plugin)
- Gutenberg block editor (WordPress Mega Menu plugin)
Adding a WordPress Navigation Menu Plugin for Elementor
For the next tutorial, we chose Stratum – one of the WordPress navigation menu plugins created for the needs of the Elementor page builder. The primary goal of this plugin is to help users create complex navigation menus. In other words, this mega menu builder allows you to fit any type of content in submenus using Elementor widgets.
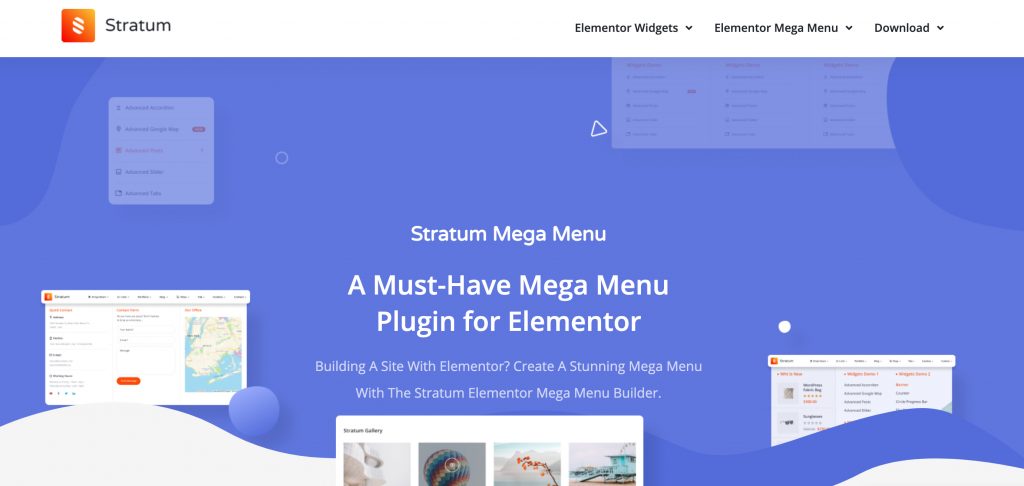
Features of Stratum Mega Menu:
- The plugin works well for all types of websites;
- Supports any content type (widget) in submenus;
- Extensive styling options for all menu elements (submenus, icons, badges, etc);
- Horizontal & vertical & hamburger (mobile) layouts;
- Multiple animation effects.
Now, let’s go straight to our mini-tutorial on how to create a WordPress navigation menu with Stratum.
Step 1. Create & Add a Menu To Your Page
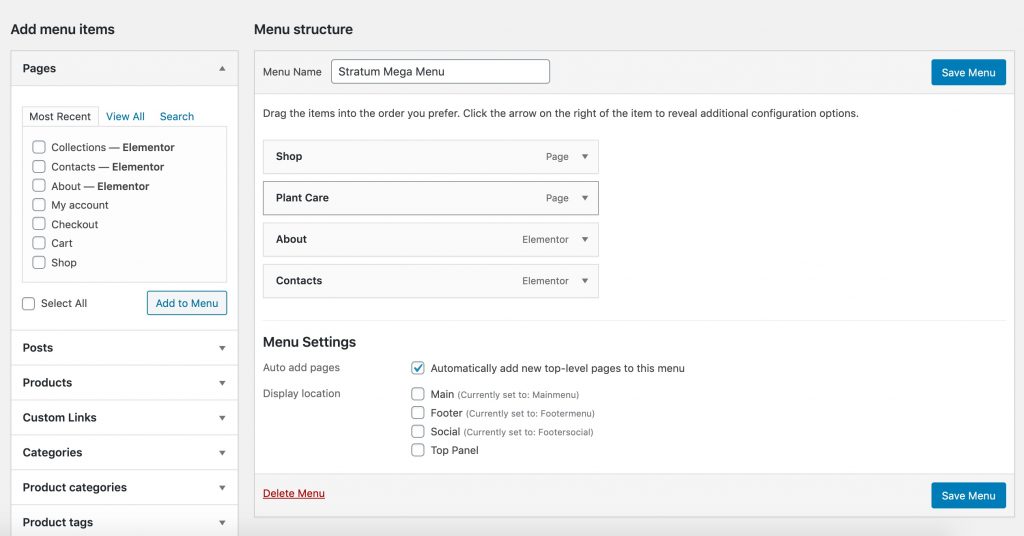
In the WordPress dashboard, go to Appearance > Mega Menu. After you install the Stratum Mega Menu, you will see a short written guide on how to use the plugin. Then, visit Appearance > Menus. You will see the settings for your menu structure defined by your current theme (in case any theme was installed).
Whether you have a current theme or not, go ahead and add a new menu:
Step 2. Customize Menu Items
This is a step where you define the structure of your drop-down menu and link your items to the needed page links.
Below the Menu name, you can see the current structure of your menu. You can add the number of menu items (pages, posts, products, categories, etc) by dragging the new ones from the left bar. For your top-level items, you can add sub-items and create as many menu levels as you need.
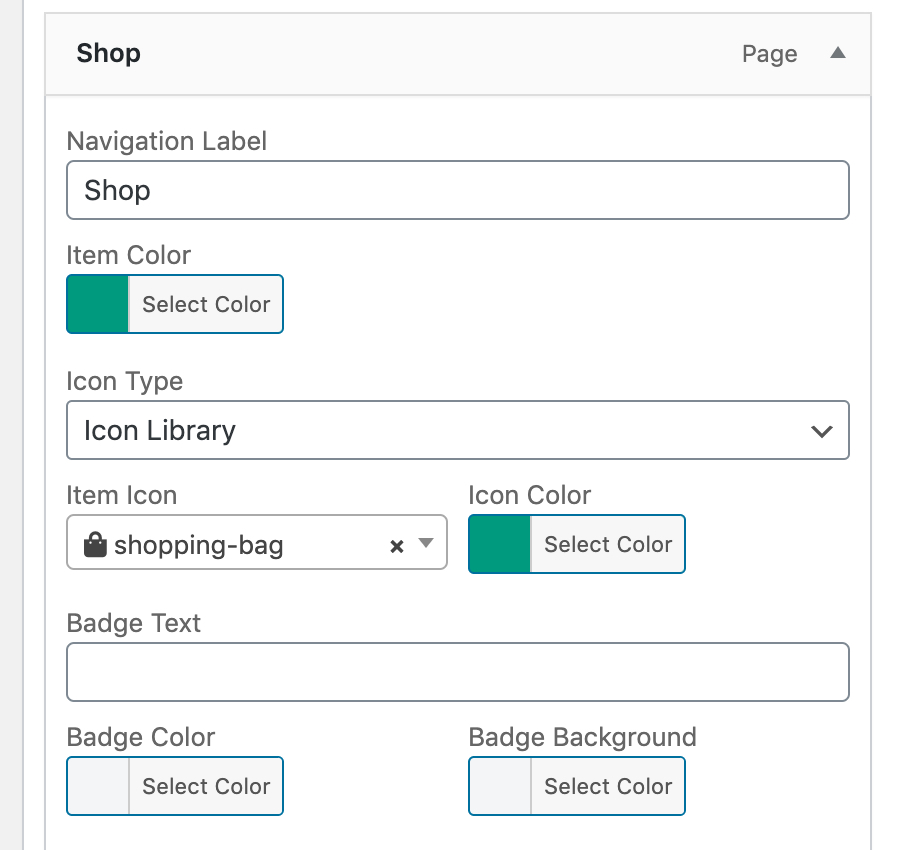
By clicking any item, you will see its styling settings. Stratum allows you to add icons, badges and define their colors:
Step 3. Customize The Look Of A Mega Menu
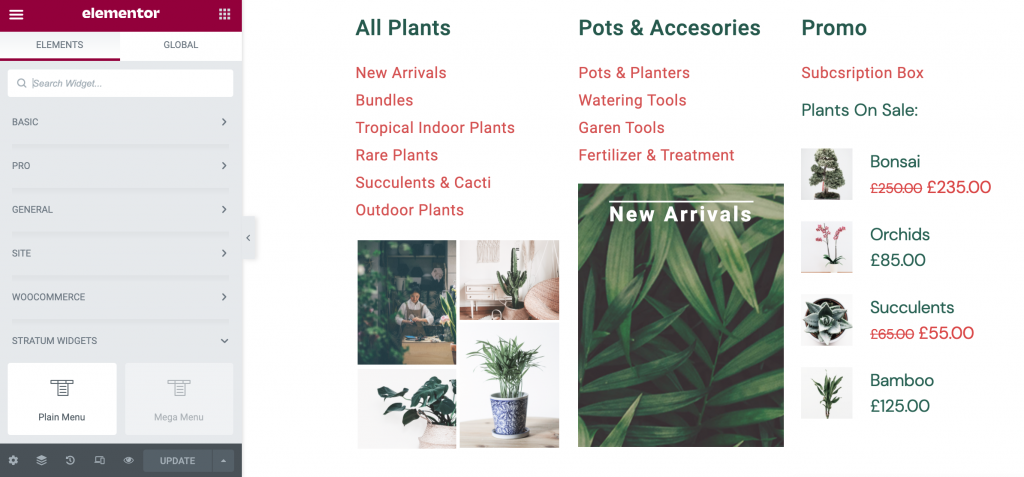
After you click “Enable Mega Menu” + “Edit Mega Menu”, you access the Elementor visual builder interface. This is where you may edit the outer look of your mega menu.
All you need to do is to add the needed widgets to each dropdown submenu. You can add as many columns as you need and then, add any Elementor widget from your list. This can be image galleries, headings, banners, product lists, price lists, and more.
Stratum lets you choose between horizontal or vertical menu layout, as well as offers settings for a responsive menu look. It provides settings for animation, and width & padding, as well as styles for items, icons, arrows, badges, and a dropdown.
The final result of a more advanced navigation menu looks this way:
After you complete editing in a page builder, your last step would be to replace the default menu of your current theme with a newly-created mega menu. Go to the Page Attributes of each page and select “Elementor Canvas” instead of a Default template.
Click to read a more detailed guideline on how to build a WordPress mega menu in Elementor using one of the Gutenix skins.
Making a One Page Navigation Menu In WordPress (Gutenberg)
If you are more of a Gutenberg fan, there is an alternative MotoPress plugin called WordPress Mega Menu. The plugin consists of several hierarchical blocks to help you achieve the needed menu structure. Those blocks are 1) Megamenu, 2) Mega menu item, 3) Plain menu and 4) a Plain menu item.
Features of WordPress Mega Menu:
- 100% free of charge
- The plugin works well for all types of websites
- Supports any content type (widget) in submenus
- Extensive styling options for all menu elements (submenus, icons, badges, etc)
- Horizontal & vertical & hamburger (mobile) layouts
- Multiple animation effects
Step 1: Create a Menu With a Mega Menu Block
We will start with a Mega Menu block. It allows you to create a navigation menu with different items with links:

In this block, you will see the styling settings, namely:
- the ability to change the font size & color
- the ability to change menu width
- Mobile view settings
Step 2: Add Submenus
With the given megamenu block, you can add a so-called drop-down menu to the top-level menus. You can use either normal links or any Gutenberg block to create the menu content.
- To add a normal link as a submenu, add a separate Plain Menu block and insert the needed link:

- To add ANY Gutenberg block (whether a default one or from a third-party developer), simply click “Submenu” and insert the needed block. All Gutenberg blocks appear dynamic, so oftentimes, they allow users to perform actions right from the submenu.
Overall, the Mega Menu block lets you display any content type: from simple links to images, icons, or entire page templates.
Alternative Step: Add Submenus With the Plain Menu Block
Alternatively, you can go ahead and add a simple plain menu with another plugin’s block of the same name. This WordPress navigation block offers basic settings for both content and styling. This is just enough for users who want to build a simple menu (though, it can have a multi-level structure) with links only:

Making a One-Page Navigation Menu in WordPress
In case you are still trying to puzzle out where to start building an anchor menu, we are here with another solution. Making a one page navigation menu in wordpress with anchors is possible even with a default Gutenberg block. Want to know how? Let’s go straight to our next tutorial!
Firstly, go to your landing page and find a section, where you want to place an anchor. Remember, that in Gutenberg you can’t give a web address to any Image block. That is why we will give the link to the Heading blocks.
After that, open the Advanced tab and enter a word or two in the HTML Anchor field. Do it with each section on your landing page you want to link.

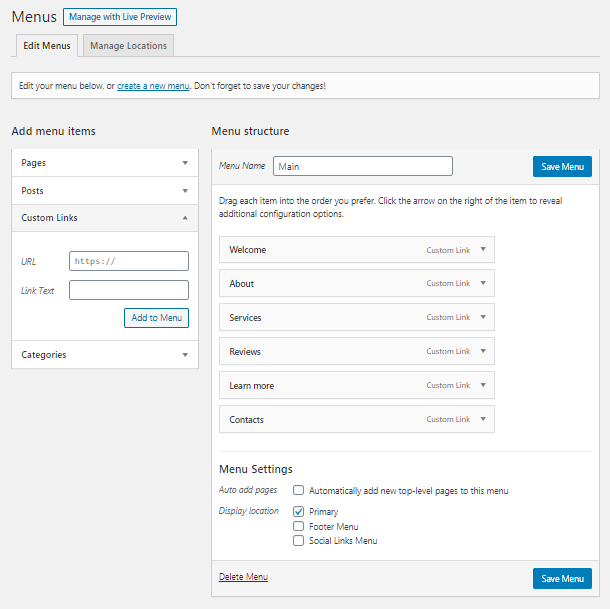
As a next step, you need to move to the admin dashboard > “Appearance” > “Menus”. Whether you already have a menu or not, you should create a new one. Give your menu a name in the “Menu Name” field and click the “Create Menu” button.

After that, take a look at the Menu Structure area. Here you can change the menu name and here your items will showcase.
In the Menu Settings area, choose where to display menu location on your landing page. In fact, you can place it wherever you want, even in the footer.
Use the Custom Links tab to add the anchor links with the titles to your menu.

Firstly in the URL field, you need to write the anchors, you gave to your sections, beginning with “#” with no spaces. In the Link Text field, you are able to give your link any name you want to display as a menu item. Don’t forget to save the menu after adding all anchors.
We will create a navigation menu with a few landing page sections:
- Welcome hero section;
- About block;
- Services block;
- Reviews and testimonials block;
- Get in touch block;
- CTA block.
Customize the Menu
Now, let’s go to the draft of your landing website. Add a Navigation block at the top of your page and click on the “Create empty” text.

Type each of your HTML anchors, that you’ve given to the sections before. You can enable them to open in the new tab, add nofollow to the link and write down the description.

After you’ve added all HTML anchors to your navigation menu, you are able to style it up. Choose one of the layouts, replace the items, and set the text size.

Take a look at the result of your work:

Create WordPress Navigation Menus Effortlessly!
Make sure you have a highly functional menu with convenient navigation BEFORE you decide to expose your site to the public. Not only will it contribute to a pleasant user experience but also help improve your SEO rankings.
